Depending on how thorough you want to be, or how stubbornly your keyboard refuses to work, you will want some or all of these supplies to clean and recondition it.
| Keyboard Cleaning and Reconditioning Supplies | ||||||||||||
|---|---|---|---|---|---|---|---|---|---|---|---|---|
| Tool | Notes | What it Looks like | ||||||||||
| keycap-puller | (two loops of wire on a handle). If you try to pry them off some other way,
you can easily damage the keys. You need the wire loops to lift straight up
evenly on both sides. You can find various suppliers by Googling keycap
puller.
This tool is crucial because trying to remove keycaps any other way is very
likely to damage the keyboard. |
 | ||||||||||
| tweezers | for pulling out trapped hair, crumbs and grit. They can also be used to scrape gunk off. I prefer the ones with rounded tips and two pads on the end that clamp over the length of a hair, giving me a good grip to pull it out. If the pads get out of alignment so they don’t meet properly over the entire surface, they will be useless for extracting hairs stuck in the mechanism. | 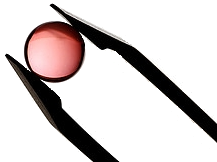 | ||||||||||
| tooth brush | old, clean, soft-bristle. Old and supple is better than new. You don’t want to apply too much pressure. | 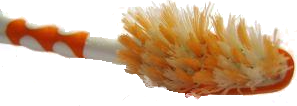 | ||||||||||
| Hair dryer | Use only on cold setting. | 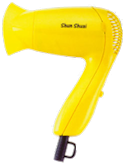 | ||||||||||
| cotton pads | Cotton pads like women use to clean off makeup. Failing that Kleenices. Failing that a clean microfibre cloth. | 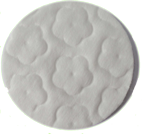 | ||||||||||
| Paper towels | 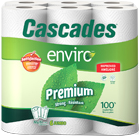 | |||||||||||
| Foam tip swabs | that you can at an electrical supply store, or failing that cotton Q-Tips or other cotton swabs. | |||||||||||
| Q-Tips | if you can’t get foam tip swabs. Q-Tips tend to shed shreds of cotton you have to pick out with tweezers. | 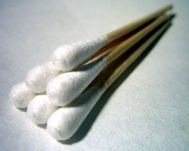 | ||||||||||
| Sharpie | fine tip permanent marker | |||||||||||
| isopropanol 99% | aka isopropyl alcohol. Get the 99% pure type from your local pharmacy. You may have to ask at the counter to get the pure version. You don’t want methanol, methyl alcohol, wood alcohol or rubbing alcohol. | 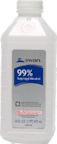 | ||||||||||
| Lysol All Purpose Cleaner | This sounds like an ad, but this particular formula is the best for cleaning keycaps I have ever tried. It comes in a spray bottle. It looks like yellow Windex. | 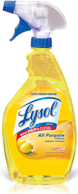 | ||||||||||
| Windex | You can use any brand of glass cleaner, aka blue juice. You want something
with ammonia or other strong grease cutter. You can even make your own high
quality one you can use on your windows and glassware as well as your
keyboards: You can make a powerful yet environmentally friendly glass cleaner similar to Windex. Here is a recipe for a three 650 mls (1.37 US pints) sprayers full:
The blue food colouring is optional; it helps identify the sprayer contents as window cleaner. Use a microfibre cloth. |
 | ||||||||||
| WD-40 | This is a light-weight lubricating oil that comes is a small aerosol can. You can get in at any hardware store, or the mini-hardware sections of almost any supermarket. | |||||||||||
| DeoxIT D | Small bottle of DeoxIT D series, née DeoxIT Red, née Cramomlin Red. This is fairly expensive, an optional luxury. |  | ||||||||||
A super quick cleaning is primarly to free up sticking keys:
A quick cleaning is primarily for appearance and sanitation. For a quick cleaning you will need the following:

You could also create the map by photographing your keyboard with a digital camera and printing it out as large as possible. You will need this map when it comes time to put the keycaps back on. Even if you are a 100WPM (Words Per Minute) 8 CPS (Characters Per Second) touch typist, you will still need this. Having a layout diagram in the computer is of no use because: your keyboard will not necessarily be functional enough and because pressing keycaps back on at random will drive your computer insane and your computer won’t sit still displaying the map, constantly scrolling away from showing the map.
Notebook keyboards are quite delicate and the inner mechanism are exposed. Even pulling the keycaps can disassemble or break the tiny little plastic parts that form the mechanism. I suggest just a blast of compressed air in the cracks between the keys and wiping with isopropanol without ever removing the keys. If you bravely want to pull the keycaps anyway, hold the keycap puller with a finger pressing the key so that when it comes loose, the light flimsy keycap won’t go flying off. You will see dust packed around the mechanisms like felt. You can get rid of it with a blast of compressed air or a clean Q-tip. Be careful not to get any Q-tip lint in the mechanism. If you break one of the keycap mechanisms, examine the mechanism from a similar key to see how it works. Pick a similar key. Different keys may have different mechanisms. Dell uses a mechanism that looks like two intersecting trapezes pinned together to allow rotation around microscopic plastic pins. Needless to say, these are extremely delicate. Don’t force anything! Make sure you study the various parts carefully in a strong light to make sure you don’t try to reassemble them upside down. I am mystified how anyone could assemble such a keyboard in less than a week.
The problem is, if you damage the keyboard, you can’t just buy another one; you have buy a whole new notebook!
This page is posted |
http://mindprod.com/bgloss/keyboardcleaning.html | |
Optional Replicator mirror
|
J:\mindprod\bgloss\keyboardcleaning.html | |
Please read the feedback from other visitors,
or send your own feedback about the site. Contact Roedy. Please feel free to link to this page without explicit permission. | ||
| Canadian
Mind
Products
IP:[65.110.21.43] Your face IP:[3.141.24.134] |
| |
| Feedback |
You are visitor number | |